Supplies
- Spice rack building kit, such as IKEA’s Bekvam (one for each shelf you want)
- Primer (optional)
- Paint, spray paint or stain
- 2 anchors and screws per shelf
- Drill
Deciding how to use your home’s space is almost always a struggle, especially if you’re dealing with limited square footage.
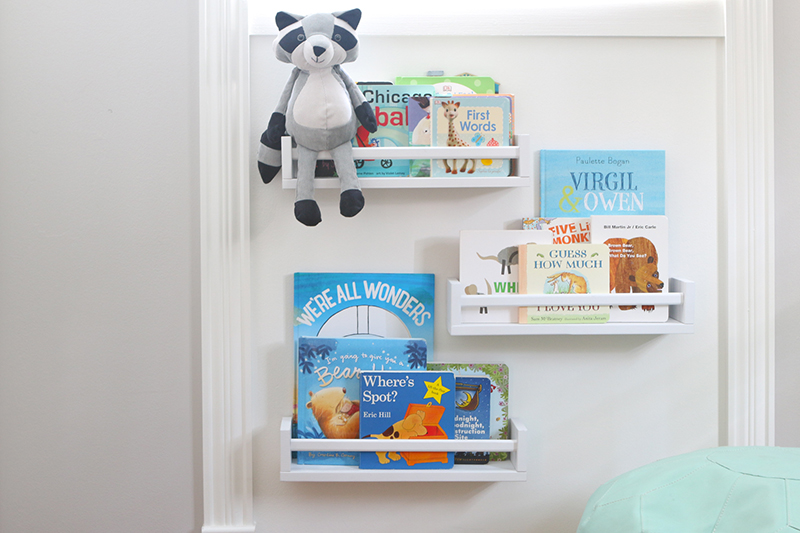
Today’s simple project offers an affordable - and adorable - storage solution for children’s books. These DIY bookshelves boast a small footprint, making them perfect for even the smallest nursery, playroom or family room.
1. Buy your supplies
You’re probably wondering why we’re telling you to buy spice rack building kits. Honestly, these petite shelves are quite versatile and solve many storage solutions in just about any room of the house - you can adapt them to organize office supplies, toiletries and more.
But for today’s project, we’re transforming them into bookshelves. We used IKEA’s Bekvam rack, but any similar kit will work.
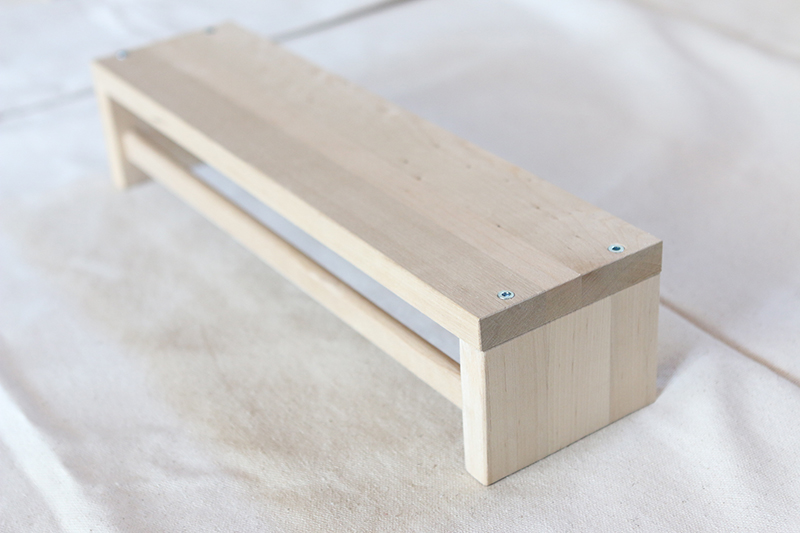
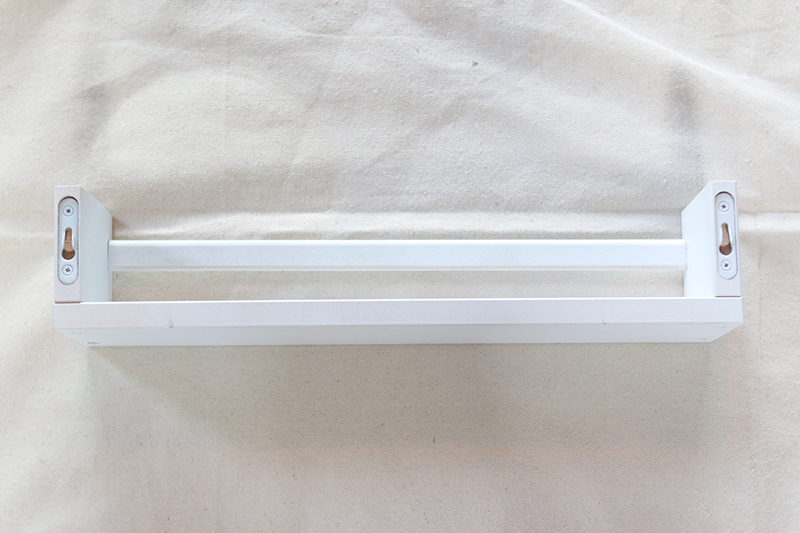
2. Build the shelves
In the case of the Bekvam rack, the kits come with simple directions on how to put the four pieces of wood together, along with all the tools you need. The process is very simple, though it does require a little muscle.
Essentially, you’ll line up all four pieces of wood and tighten four screws into place with an Allen wrench. Each shelf should take no more than 5-10 minutes to assemble.
3. Paint or stain the shelves
We spray-painted the shelves after assembling them, but you can paint or stain the wood pieces before, too. We used two coats of this white paint/primer combo to evenly cover the shelves.
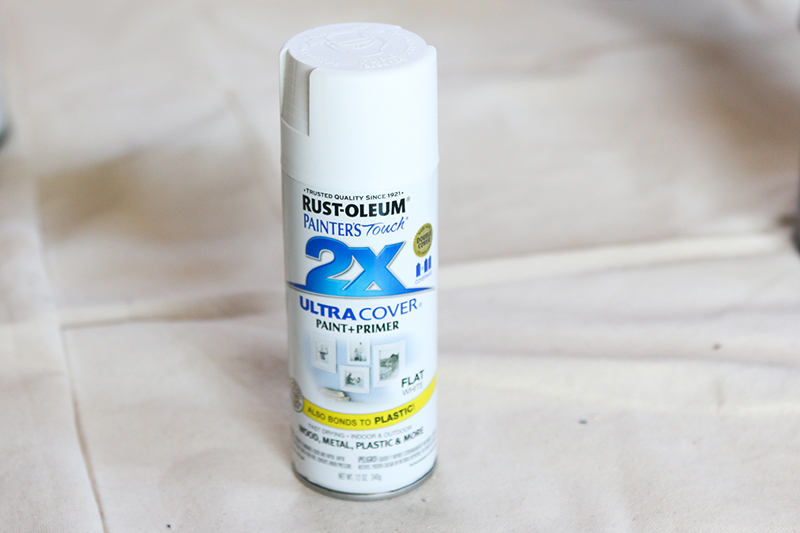
Because it’s raw wood, we recommend priming before painting. If your desired color isn’t available in spray paint, hand-painting is also a great option. And if your room’s style is dark, or if it has wood molding, you can stain the shelves instead.
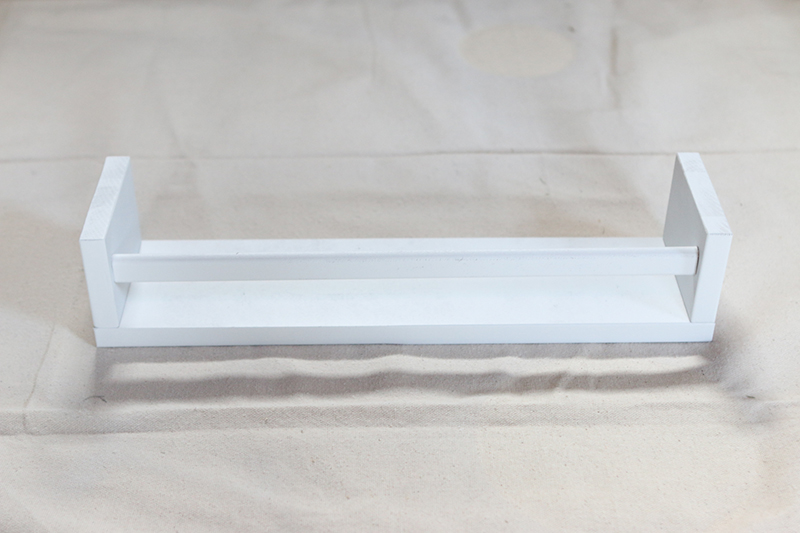
The personalization possibilities are endless!
4. Hang the shelves
We hung all three bookshelves using two anchors and two screws per shelf. The screws and anchors weren’t included in the kit we used, so make sure you have your own hanging equipment and drill for this step.
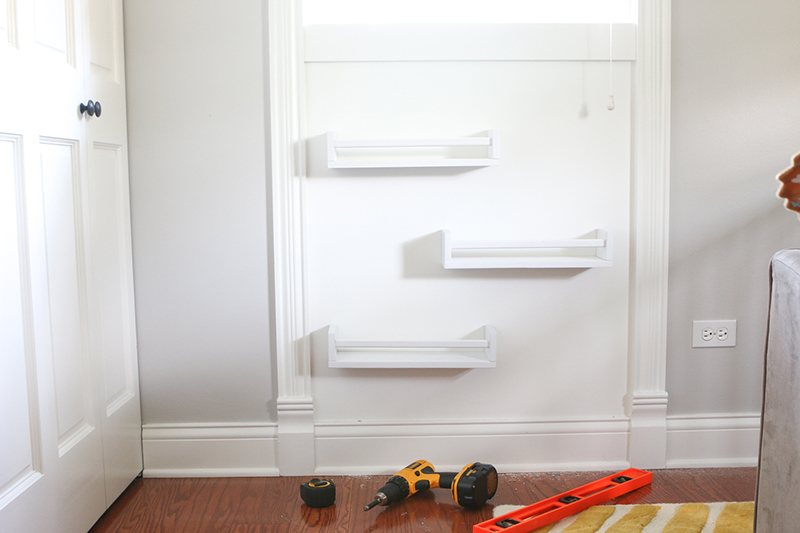
Because our shelves didn’t line up with studs in our wall, reinforcing them with anchors was essential, because they’ll eventually hold books.
The backs of the shelves come with holes for hanging, so once you install the anchors and screws into the wall, you can easily place the shelves onto the screws and finish this step.
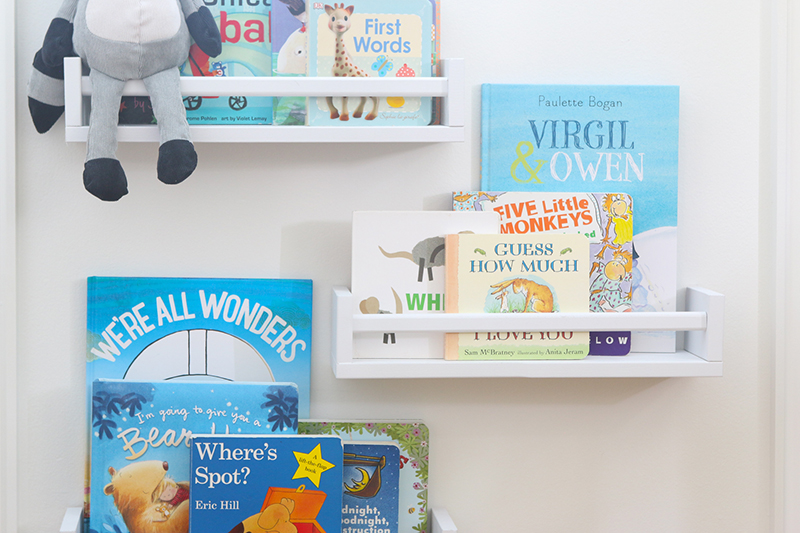
5. Add books
It’s finally time for the fun part! Corral all the books in your small space, and place them on your new bookshelves. Instead of a book basket on the ground, these shelves use your home’s vertical space to maximize the floor plan.
If you hang the shelves close to the floor, little ones can help themselves and enjoy their own little library. You can also hang them behind a bedroom door - the perfect solution for nurseries, bedrooms or playrooms tight on space.
Think outside the box
If you don’t need bookshelves, you can easily adapt this DIY to meet your needs.
Hang the shelves by your desk, and fill them with jars for pens, pencils, paper clips and other essentials that take valuable desk space. Or, if your bathroom lacks counter space, hang them on the wall, and fill them with a few mason jars for your toothbrush, toothpaste, cotton balls and cotton swabs.
There are so many storage issues these easy DIY shelves can solve, so don’t be afraid to look around your house and get creative!
Originally published August 24, 2017.
Related:
;)