Take your green thumb to new heights (and small spaces!) with a vertical garden.
This DIY is a great way to integrate a little greenery into any space, including an apartment or small porch.
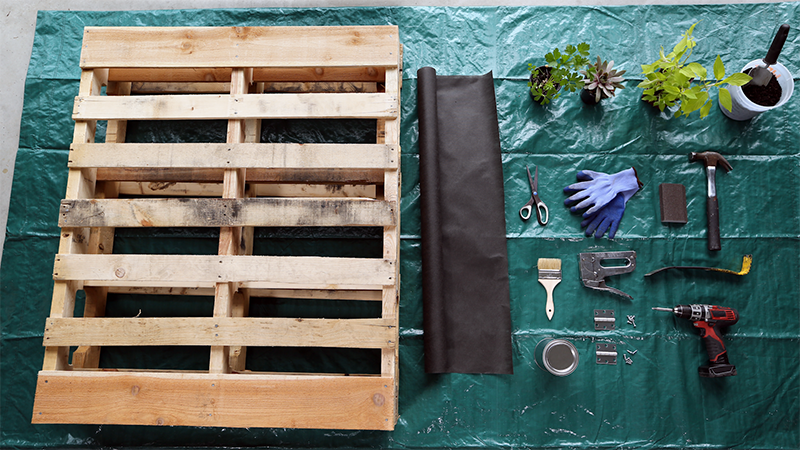
Supplies:
- Two pallets
- Tarp
- Hammer
- Pry bar
- Gloves
- Safety goggles and ear protection
- Sanding blocks or sandpaper
- Paintbrush
- Water-based stain
- Water-based clear sealant
- Two 3 1/2-inch utility hinges
- Screws
- Landscape fabric
- Staple gun and staples
- Screwdriver or screw gun
- Scissors
- Organic potting mix
- Fertilizer
- Plants
A note on plant choice: Before you go wild at the garden center, consider your vertical garden’s placement.
To grow most vegetables, herbs, succulents and annual flowers, you will need at least six hours of direct sunlight. A shady spot limits your choices, but you can still create a lush planting of shade-loving foliage plants, begonias and coral bells.
Many vegetables and annuals will only succeed in certain conditions, so read the tags to decide if they're right for this season. Finally, consider the potential size and habit of each plant before packing them into such a small space.
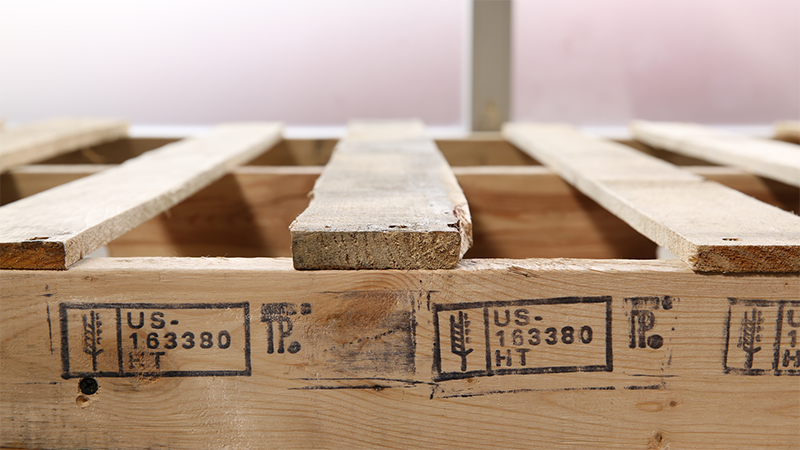
1. Source heat-treated pallets
Many pallets are treated with toxic chemicals, so look for the initials “HT” to select heat-treated pallets. The wood should also be hard, clean and relatively smooth.
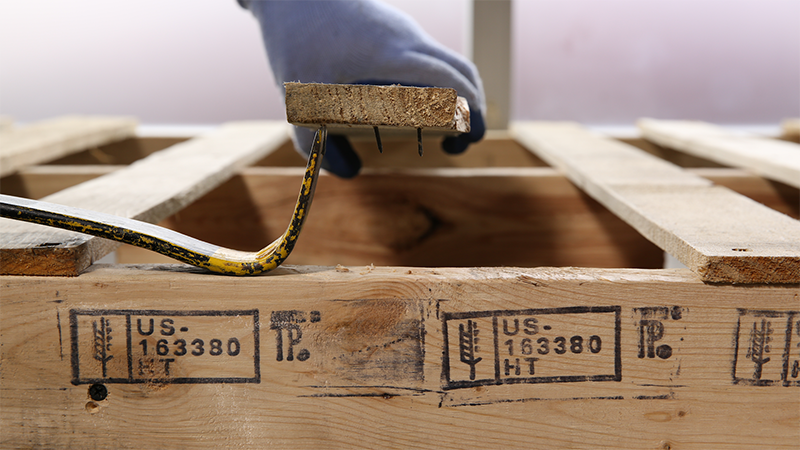
2. Add space by removing boards
Wearing ear and eye protection (it’s a loud process!), remove every other board with a pry bar. This will give plants sunlight and room to grow.
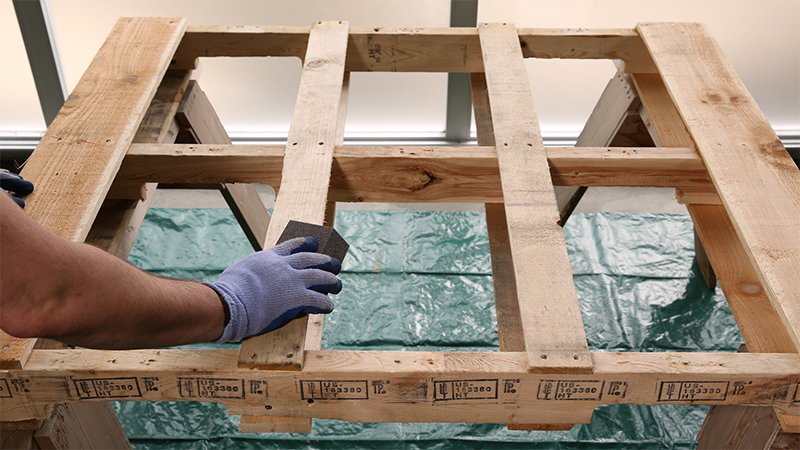
3. Sand rough spots
Wearing gloves, remove any debris. Sand down the splinters and rough edges, hammering down or replacing any protruding nails.
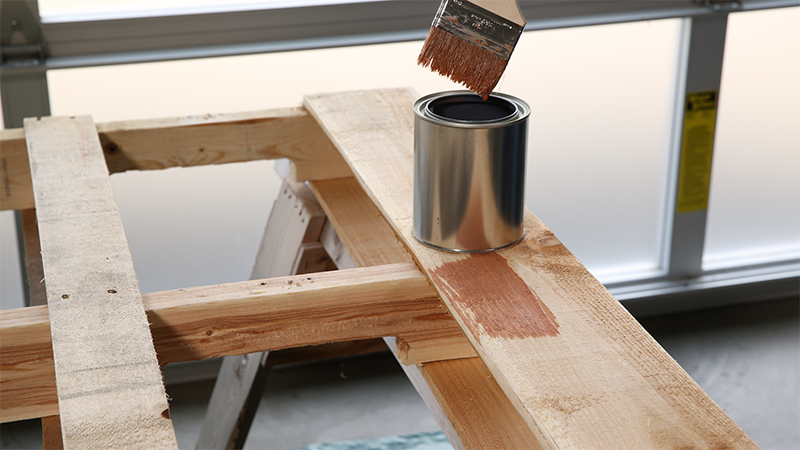
4. Apply waterproof stain
For a decorative finish, apply a water-based wood stain. Using a paintbrush, paint along the grain of the wood, and wipe off any excess stain with a rag.
If you're growing vegetables or herbs, line the inside with plastic before planting. This will prevent chemicals from leaching into the potting mix.
Allow the stain to cure for at least 24 hours. Once dry, apply a layer of water-based clear sealant to protect the wood from the elements.
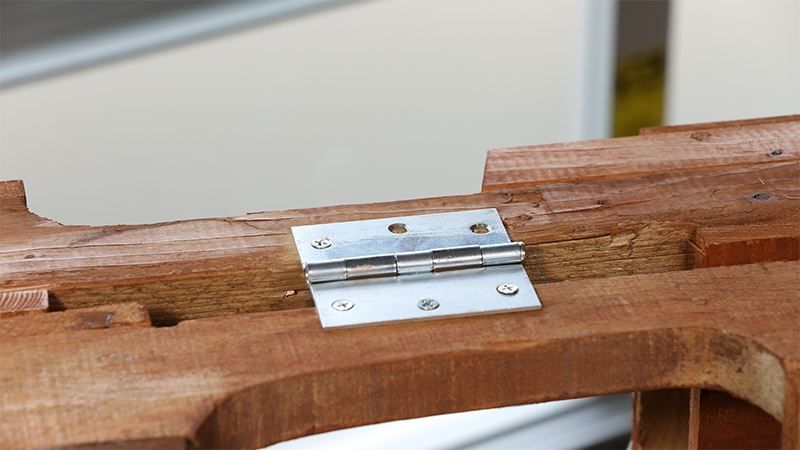
5. Connect pallets with hinges
Stack the two pallets together, ensuring that the bottom edges are level. Attach the hinges to the sides of the pallets with screws, placing them about one-third and two-thirds of the way down for stability.
You may also choose to drill pilot holes first to prevent splitting.
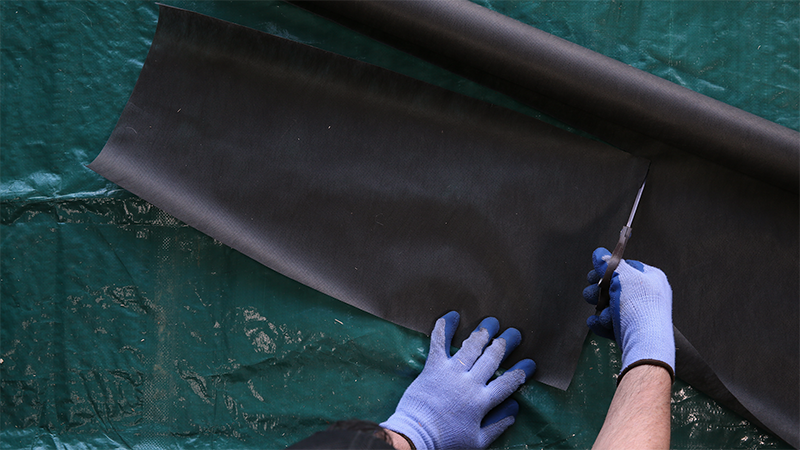
6. Cut landscape fabric
Since pallets come in all shapes and sizes, use the first sheet of landscape fabric to create a template. It should provide ample planting room, as well as about an inch of overlap for the stables.
Once you've tested the template, cut the remaining sheets to the same size.
7. Line pallets with fabric
Create a pocket by tucking the landscape fabric into the opening, and staple it in place along the outer edge. Repeat for the remaining pockets.
If extra moisture retention is needed, include an extra layer of fabric.

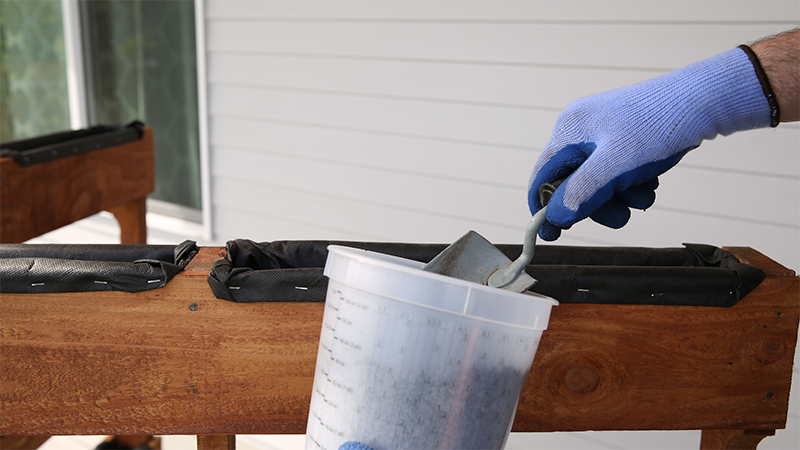
8. Add organic soil
Before adding potting mix, move the pallet garden to its final location, making sure that it will receive enough sunlight for the plants you've chosen.
Fill each pocket about three-fourths of the way full with moisture-retentive potting mix. Set aside some potting mix so that you can add a layer after planting.
9. Add fertilizer
If the potting mix doesn't already contain fertilizer, sprinkle fertilizer over the surface according to label instructions.
10. Add plants
Before planting, water each plant to keep their brittle roots from breaking. Then slip each plant's rootball out of the pot, soil and all. Gently tease apart the roots with your fingers, and nestle them into the potting mix, one by one.
Since excess water will drip down to the lowest pockets, fill the upper pockets with drought-tolerant plants such as succulents, sedums, rosemary and lavender. In the lower pockets, incorporate thirstier plants like ferns, basil and mint.
Once the plants have been arranged to your liking, cover with another layer of potting mix, and lightly sprinkle with water to help the mix settle around the roots.
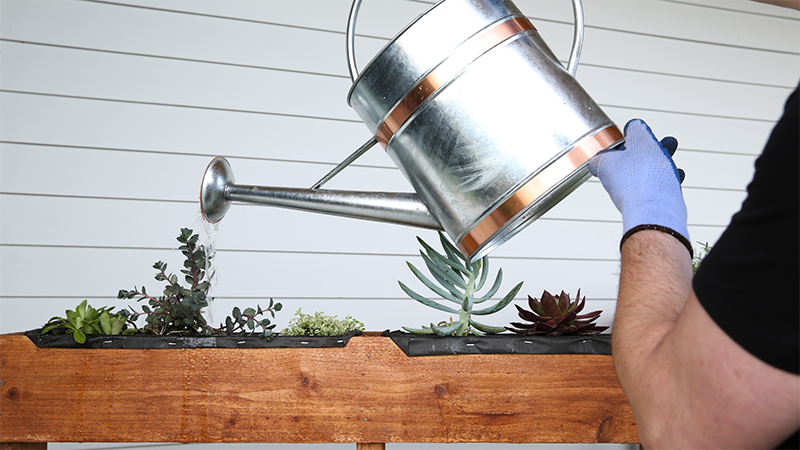
Caring for your vertical garden
Water the uppermost pocket every morning, allowing enough water to reach the other plants. You may need to water two to three times for thirstier varieties of herbs and vegetables, particularly on hot days.
Feed plants once a week with a liquid fertilizer to replace any nutrients that leach out from the potting mix.
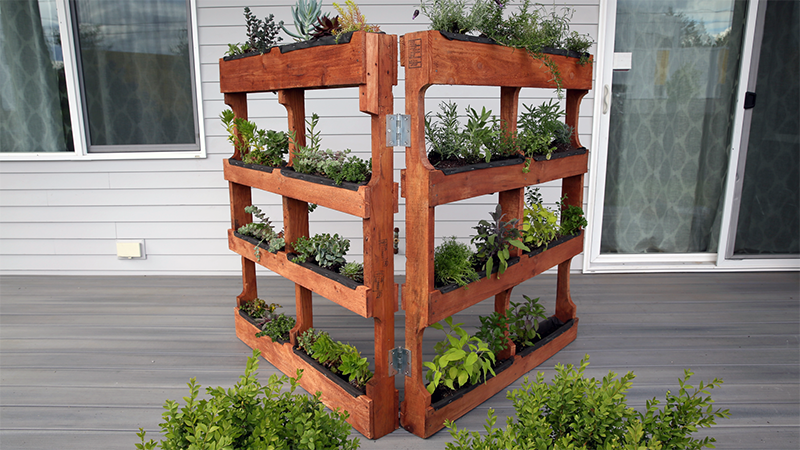
Now it's time to enjoy your vertical garden and its bounty.
As plants outgrow their space, transplant them to the garden or larger containers. You may also choose to start from scratch each season, planting a whole new garden from seeds or transplants.
Related:
;)